The nostalgic swirl of soft-serve ice cream, reminiscent of seaside holidays and ice cream vans, holds a special place in British culinary culture. That distinctive texture—impossibly smooth, light as air, with a peculiar stretchiness that sets it apart from conventional ice cream—has captivated generations. For decades, recreating this beloved treat at home seemed an impossible dream, reserved only for those with commercial-grade equipment and industrial kitchen space. However, recent developments in domestic ice cream technology and a deeper understanding of frozen dessert science have made achieving authentic Mr Whippy-style results surprisingly accessible. The key lies not in expensive machinery alone, but in mastering the delicate balance of ingredients, understanding the physics of overrun, and employing precise temperature control throughout the churning process. Whether you’re seeking to indulge childhood memories or simply elevate your dessert-making repertoire, the journey to perfect soft-serve begins with understanding what makes this confection so uniquely appealing.
Understanding the science behind Soft-Serve ice cream texture and overrun
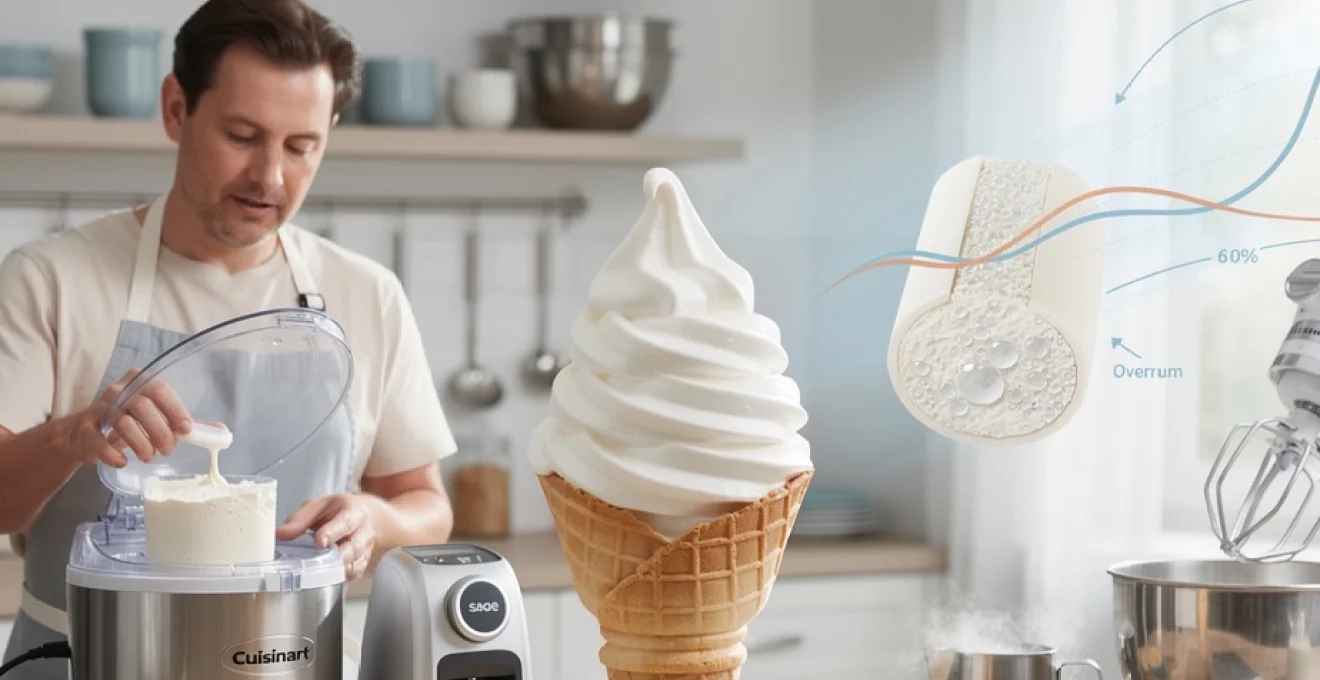
The ethereal texture of authentic soft-serve ice cream results from a precisely controlled manufacturing process that differs fundamentally from traditional ice cream production. At the heart of this difference lies the concept of overrun—the percentage of air incorporated into the base mixture during freezing. Commercial Mr Whippy typically contains between 30-60% overrun, meaning the final product contains up to 60% more volume than the liquid base from which it was created. This substantial air incorporation creates the characteristic lightness and makes the ice cream pipe-able directly from the machine, rather than requiring the rock-hard freezing of conventional ice cream.
Calculating optimal overrun percentage for authentic mr whippy consistency
Determining the correct overrun percentage requires understanding both the weight and volume of your base mixture. Professional ice cream makers calculate overrun using the formula: [(final weight – original weight) / original weight] x 100. For home reproduction, you’re targeting approximately 40-50% overrun for that genuine soft-serve experience. This means if you start with 1000g of base mixture, your finished product should weigh around 666-714g per litre. Too little overrun produces a dense, heavy product; too much creates an insubstantial, icy texture that melts almost immediately. The sweet spot delivers that distinctive Mr Whippy mouthfeel—substantial enough to coat your tongue, yet light enough to seem almost impossibly airy.
The role of emulsifiers and stabilisers in achieving smooth texture
Commercial soft-serve relies heavily on emulsifiers and stabilisers to maintain its characteristic texture and prevent ice crystal formation. Emulsifiers such as mono- and diglycerides help fat globules disperse evenly throughout the mixture, creating a smoother mouthfeel and improving air incorporation during churning. Stabilisers like guar gum, carrageenan, and locust bean gum serve multiple functions: they bind water molecules to prevent ice crystal growth, improve body and texture, and slow the melting rate once served. For home production, you can source food-grade versions of these ingredients from specialist suppliers, though many successful recipes achieve remarkable results using condensed milk, which contains natural emulsifiers and stabilisers, combined with double cream’s inherent fat structure.
Temperature control during churning: the critical -6°C to -4°C range
The serving temperature of soft-serve ice cream sits considerably higher than conventional ice cream, typically between -6°C and -4°C compared to the -18°C of hard-frozen varieties. This warmer temperature keeps the product soft enough to pipe whilst maintaining sufficient structure to hold its iconic swirl shape. During the churning process, you must achieve rapid freezing whilst simultaneously incorporating air—a delicate balance that commercial machines accomplish through refrigerated cylinders and specially designed dasher blades. Home ice cream makers approximate this process, though achieving and maintaining this precise temperature window presents the greatest challenge for domestic production.
Fat content requirements: balancing milk solids and cream ratios
The fat content in soft-serve ice cream typically ranges between 3-6%, significantly lower than premium ice creams
The fat content in soft-serve ice cream typically ranges between 3-6%, significantly lower than premium ice creams that can exceed 12-18% fat. This leaner profile is one reason Mr Whippy-style ice cream feels lighter on the palate and melts more quickly. To mirror this at home, you need to balance your ratio of cream, whole milk, and milk powder so that you build enough structure and flavour without tipping into dense gelato territory. A useful benchmark is to aim for around 10-12% total fat in your base mix before overrun, which will translate into that recognisably “whippy” feel once aerated. Too much cream and the mixture will coat your mouth like clotted cream; too little and it becomes thin, icy and more akin to a milkshake.
Milk solids-not-fat (MSNF)—primarily from milk powder—play a crucial supporting role here. While fat provides richness and helps trap air, MSNF adds body, chew and that subtle dairy sweetness you associate with proper soft-serve. In practice, this means using less double cream than in classic no-churn ice cream recipes and topping up the structure with skimmed milk powder and whole milk. Think of fat as the cushions on your sofa and MSNF as the frame underneath: both are necessary, but the right balance stops you sinking straight through or sitting on something rock hard. As we move into formulation, you’ll see how adjusting these components lets you fine-tune your homemade Mr Whippy-style ice cream to personal preference.
Essential equipment for replicating commercial Soft-Serve results at home
While you can get surprisingly close to Mr Whippy-style ice cream with nothing more than a freezer, whisk and piping bag, specialised equipment makes the process more repeatable and the results more consistent. Commercial soft-serve machines chill, churn and dispense in one continuous process, keeping the mix at that crucial serving temperature of around -6°C. At home, we approximate this workflow by separating the steps: ageing and chilling the base, controlled churning to incorporate air, and then serving or holding at a slightly warmer temperature than standard ice cream. Your equipment choice will influence how much overrun you can achieve, how fine your ice crystals are and how precisely you can control serving consistency.
Broadly, home enthusiasts fall into three camps: self-refrigerating ice cream machines, freezer-bowl machines (including stand mixer attachments) and more experimental techniques such as liquid nitrogen. Each has its pros and cons in terms of texture, convenience and cost. If you’re chasing that picture-perfect soft-serve swirl on a regular basis, a compressor machine offers the most “set and serve” experience. However, if you only make Mr Whippy-style ice cream occasionally, a good-quality freezer bowl or even a high-powered blender paired with clever freezing techniques can still deliver excellent results. Let’s compare the most common domestic options and how they relate specifically to soft-serve ice cream at home.
Domestic ice cream makers: cuisinart ICE-100 vs sage smart scoop
Self-refrigerating machines like the Cuisinart ICE-100 and Sage Smart Scoop are the closest you’ll get to a true soft-serve experience without investing in a commercial unit. Both use built-in compressors to continuously chill the bowl as it churns, which is essential for maintaining that narrow temperature band and achieving stable overrun. The Cuisinart ICE-100 typically offers manual time control with a robust motor and simple interface, making it excellent for those who like to tweak processes themselves. The Sage Smart Scoop adds automatic hardness settings and clever sensors that monitor the mix, holding it at serving texture for a period after churning—very handy if you’re serving guests.
For Mr Whippy-style ice cream, we’re less interested in rock-hard, scoopable texture and more focused on consistent, soft, pipe-able results. Here, the Smart Scoop’s “soft serve” or “gelato” presets can be an advantage, as they stop churning once a softer consistency is reached and then hold that state with intermittent cooling. The ICE-100, on the other hand, rewards users who are willing to watch the mix closely and stop the motor once it reaches the desired ribbon-like thickness. In both cases, pre-chilling your base to 2-4°C before churning will shorten freezing time, reduce ice crystal size and help mimic the rapid freeze of a true Mr Whippy machine. If you plan to pipe the mix into cones, you can transfer directly from the bowl into a large piping bag while it’s still at ideal serving temperature.
Stand mixer attachment methods using KitchenAid ice cream bowl
If you already own a KitchenAid stand mixer, the ice cream bowl attachment offers a cost-effective route into soft-serve style desserts. The principle is simple: you pre-freeze the insulated bowl for at least 12-24 hours, then churn your chilled base using a paddle attachment while the frozen walls gradually extract heat. This setup won’t hold a stable serving temperature indefinitely like a compressor machine, but it can still deliver beautifully smooth, aerated Mr Whippy-style ice cream when used strategically. The key is timing: because the bowl gradually warms up, you want your base extra cold and your churning window relatively short.
For best results, chill your mix overnight in the fridge and aim to churn a slightly smaller quantity than the bowl’s maximum capacity; this improves circulation and air incorporation. Start the mixer on low to medium speed before pouring in the base, which helps prevent the mixture instantly freezing in contact with the wall and forming icy clumps. You’re aiming for a soft, billowy texture that just holds a peak—similar to softly whipped cream—rather than a firm, scoopable mass. Once that stage is reached, quickly decant the ice cream into a piping bag fitted with a large star nozzle and either serve straight away, or hold it in the freezer for 20-30 minutes to firm up slightly without fully hardening. Treated like this, a KitchenAid bowl can deliver swirls remarkably close to what you’d get from a soft-serve machine.
DIY nitrogen infusion techniques for ultra-smooth consistency
For the truly adventurous, liquid nitrogen (LN2) offers a dramatic yet scientifically sound method of making ultra-smooth Mr Whippy-style ice cream at home. Because nitrogen boils at -196°C, it freezes the mix almost instantly, creating extremely small ice crystals and a velvety, stretchy texture. When you whisk nitrogen into a cold base, you’re effectively flash-freezing it while whipping in air—very similar in outcome to the rapid-chill, high-overrun process in commercial machines. This technique has been popularised in modernist kitchens and ice cream bars precisely because it delivers such a distinctive, smooth mouthfeel.
However, liquid nitrogen demands strict safety precautions and access to a reputable supplier, so it isn’t a casual weeknight option. If you do explore LN2, always work in a well-ventilated area, wear appropriate protective gear and follow guidance from your supplier. You’ll pour small amounts of nitrogen into your base while whisking continuously with a stand mixer or sturdy hand whisk, stopping once the mixture thickens to a soft-serve consistency. Think of it as using frostbite in a bowl to your advantage: speed is everything, and over-freezing will turn your soft-serve into rock-solid ice cream. If LN2 isn’t practical for you, a high-powered blender can deliver a similar “instant ice cream” effect by blitzing partially frozen custard cubes until smooth, giving a comparable fine-crystal texture without specialist gases.
Formulating the perfect mr whippy-style base mix recipe
Now that we’ve explored the science and equipment, it’s time to build a base mix designed from the ground up for Mr Whippy-style ice cream at home. Unlike simple two-ingredient condensed milk and cream recipes, a more considered formulation lets you control sweetness, body, melt behaviour and overrun. Professional soft-serve mixes are carefully balanced systems of water, fat, sugars, milk solids, emulsifiers and stabilisers. Our goal is to capture that same balance using ingredients you can realistically source, while keeping the process accessible enough for a domestic kitchen.
As a starting point, consider this example formulation for roughly 1 litre of base: 350 ml whole milk, 250 ml double cream, 150 ml single cream, 80-90 g sugar (a blend of sucrose and glucose syrup), 40-50 g skimmed milk powder, 1-2 g stabiliser blend (such as guar gum and carrageenan) and 1-2 tsp high-quality vanilla extract. This composition gives you around 10-12% fat, 11-13% milk solids-not-fat and 15-18% sugars, which is firmly in soft-serve territory. Think of this not as a rigid recipe but as a framework: by tweaking the milk powder or sugar types slightly, you can fine-tune how “chewy”, “stretchy” or soft the finished ice cream feels. The sections below unpack each of these components in more detail so you can adapt the mix confidently.
Milk powder selection: skimmed vs full-cream for optimal body
Milk powder is one of the unsung heroes of Mr Whippy-style ice cream, and the type you choose has a noticeable impact on texture. Skimmed milk powder is the industry standard in soft-serve production because it boosts milk solids-not-fat without adding extra fat. This additional protein and lactose increase body, improve water binding and contribute to that subtle “chew” you feel when you bite into a soft-serve cone. Full-cream milk powder, by contrast, adds both fat and solids, pushing your base towards a richer, more gelato-like profile. For authentic Mr Whippy-style lightness, skimmed milk powder is usually the better choice.
As a rule of thumb, aim for around 4-6% milk powder by weight of your total mix, adjusting based on your preference for body versus lightness. Too little and the ice cream can taste watery or “hollow”, lacking that satisfying dairy backbone; too much can make it chalky or overly dense. When incorporating milk powder, whisk it thoroughly into the cold milk before heating to avoid lumps, or blend it into a portion of warm milk to create a smooth slurry. Think of milk powder as scaffolding for your ice cream: it holds everything in place so that fat, air and water work together rather than pulling in different directions. If you’ve ever wondered why basic cream-and-condensed-milk recipes can feel slightly greasy or flabby compared to van ice cream, the missing piece is almost always adequate milk solids.
Glucose syrup and dextrose: managing freezing point depression
Soft-serve ice cream’s scoopable-yet-soft nature owes a lot to smart sugar selection. While sucrose (table sugar) provides sweetness and some freezing point depression, it’s often too blunt a tool on its own. Glucose syrup and dextrose give you more nuanced control over how firm the mix becomes in the freezer. Both contribute to “freezing point depression”—the phenomenon that keeps your Mr Whippy-style ice cream pliable at temperatures where pure water would be rock solid. In simple terms, they act as edible antifreeze, helping to keep some water unfrozen and maintaining that smooth, spoonable texture.
Dextrose is around 70% as sweet as sucrose but more effective at lowering freezing point, making it ideal when you want softness without overwhelming sweetness. Glucose syrup, depending on its DE (dextrose equivalent), behaves similarly but adds a slight stickiness that enhances body and reduces iciness. A practical approach for home use is to replace 20-30% of your total sugar with dextrose or glucose syrup. For example, in a mix with 80 g total sugar, you might use 50-60 g caster sugar and 20-30 g glucose syrup. This balance keeps flavours bright, prevents the ice cream from freezing into a block at -18°C and supports that crucial soft-serve swirl when held warmer at -6°C to -4°C. It’s a bit like putting winter tyres on a car: you still move forward, but with far more control on the icy surface.
Incorporating guar gum and carrageenan for melt resistance
Guar gum and carrageenan may sound like specialist ingredients, but they are widely used in commercial soft-serve to refine texture and slow melting. Guar gum, derived from guar beans, is a powerful thickener that hydrates in cold water and dramatically increases viscosity even at low dosages (typically 0.2-0.4% of your mix). This thicker matrix helps suspend fat and air more evenly, reducing the risk of icy pockets and promoting a creamier mouthfeel. Carrageenan, extracted from red seaweed, plays a slightly different role: it interacts with dairy proteins to stabilise them, improving body and helping prevent phase separation (those unwanted icy edges or watery drips).
Used together in small amounts, guar and carrageenan create a fine, elastic texture that is very close to commercial Mr Whippy-style ice cream. A common approach is to use a pre-blended stabiliser mix, but you can also weigh them individually if you have accurate scales. For a litre of base, you might start with 0.2 g carrageenan and 0.4 g guar gum, dispersed into the dry sugar before whisking into your milk—this helps prevent clumping. You then heat the mixture to activate the stabilisers fully, usually to around 80-85°C, before cooling and ageing. The result? A soft-serve that holds its swirl a little longer, drips more slowly down the cone and stays smooth even after a brief refreeze—exactly what you want when serving in warm kitchens or on sunny days.
Pasteurisation requirements and safe ageing periods
Because soft-serve is typically served at warmer temperatures and often held in equipment for prolonged periods, food safety is especially important. At home, you sidestep some of the commercial hygiene challenges by making smaller batches and consuming them quickly, but proper pasteurisation and ageing still improve both safety and quality. Pasteurisation is simply the controlled heating of your mix to destroy pathogenic bacteria—usually to at least 72°C for 15 seconds (HTST) or 80-85°C for a shorter period when using stabilisers. This heating step also hydrates your stabilisers, dissolves sugars and helps milk proteins unfold, improving emulsification and texture.
After pasteurisation, rapid cooling is essential: aim to bring your base down from 80°C to below 5°C within 90 minutes, ideally using an ice bath before transferring to the fridge. Once cooled, the mix should be aged for at least 4 hours, and preferably overnight, at 2-4°C. During this ageing period, proteins fully hydrate, fat partially crystallises and stabilisers reach their optimal functionality. The practical benefit is a smoother churn, finer ice crystals and better overrun when you finally freeze the mix. From a microbiological perspective, this controlled process gives you a safer, more stable product—especially important if you’re serving Mr Whippy-style ice cream to children, older guests or anyone with a compromised immune system.
Mastering the churning process for authentic Soft-Serve swirl
Churning is where your carefully formulated base transforms into recognisable Mr Whippy-style ice cream. The objective is to freeze the mix quickly while simultaneously incorporating and distributing air. Think of it as inflating a tiny mattress inside the ice cream: you want millions of minuscule air pockets surrounded by a semi-frozen emulsion of fat and water. If freezing is too slow, large ice crystals form and the texture becomes gritty; if overrun is too low, the result is dense and heavy rather than cloud-like. Equally, churning for too long or at the wrong temperature can force out the delicate air structure you’ve just created.
Start with your base thoroughly chilled—ideally 2-4°C—before it even enters the ice cream maker. This shortens the time the mix spends in the “danger zone” where large ice crystals can form, and it increases your chances of hitting that serving temperature of around -6°C to -4°C at the precise moment the texture looks perfect. Most domestic machines will take 20-40 minutes to reach soft-serve consistency, but rather than relying on the timer alone, watch the texture: you’re aiming for a satin-like ribbon that mounds softly when lifted with a spatula. If you run your machine until the mix resembles traditional scoopable ice cream, it will be too firm to pipe and will lose that signature soft-serve elasticity.
Once your Mr Whippy-style ice cream reaches the ideal texture, move fast. Transfer it directly from the machine into a large piping bag fitted with a star nozzle, filling the bag no more than two-thirds full so you can handle it comfortably. If the mix feels a touch too loose to hold a sharp swirl, rest the filled piping bag in the freezer for 10-15 minutes, checking every few minutes to avoid over-firming. When you’re ready to serve, pipe in tight spirals from the outer edge of the cone inwards, then build upwards, finishing with a quick flourish to mimic that classic van-style peak. Wondering how to get that perfect “snap” of a flake in the side? Insert chocolate flakes or dipped wafers immediately after piping, while the surface is still soft enough to grip.
Troubleshooting common texture issues: iciness, graininess, and rapid melt
Even with careful planning, homemade Mr Whippy-style ice cream doesn’t always behave perfectly. Perhaps you’ve ended up with icy crystals, a slightly sandy mouthfeel or a swirl that collapses in seconds on a warm day. The good news is that each of these problems usually has a clear cause—and an equally clear solution. By learning to “read” the texture of your ice cream, you can diagnose issues and iteratively improve each batch, much like tweaking hydration in bread baking until you hit your ideal crumb.
Iciness is the most common complaint and is almost always linked to either slow freezing, insufficient stabilisers or an imbalanced water-to-solids ratio. If large crystals are forming, first ensure your base is thoroughly chilled before churning and that your freezer bowl or compressor machine is fully pre-cooled. Increasing skimmed milk powder slightly and incorporating a small amount of glucose syrup can also help, as they bind free water and lower the freezing point. For persistent iciness, consider adding or slightly increasing guar gum, which thickens the unfrozen phase and keeps water molecules from migrating and clustering into visible crystals over time.
Graininess or a chalky mouthfeel often stems from poorly hydrated milk powder or overuse of stabilisers. If milk powder isn’t fully dissolved before heating, tiny undissolved particles can create a sandy texture that no amount of churning will fix. To avoid this, always whisk milk powder into a portion of warm liquid to create a smooth slurry before combining with the rest of your mix. Overdosing stabilisers can also create an unpleasant “gummy” or pasty sensation, so resist the temptation to add more than recommended; these ingredients are potent at very low levels. If you’ve made a batch that feels slightly grainy, serving it at a slightly warmer temperature (closer to -4°C) can soften the perception, much like letting hard cheese warm slightly improves its texture.
Rapid melt and collapsing swirls can be frustrating, especially when you’ve nailed flavour and initial texture. This issue usually points to insufficient total solids, low overrun or under-activated stabilisers. If your soft-serve immediately slumps into the cone, review your formulation: do you have enough milk powder and sugar to build body? Have you included a stabiliser blend and pasteurised at a high enough temperature to activate it? From a process perspective, over- or under-churning can also impact stability; under-churned mix won’t have enough ice structure, while over-churned mix may have destabilised fat and lost some of its incorporated air.
If you’re serving in warm conditions, a few practical tweaks can make a noticeable difference. Chill your serving cones in the freezer beforehand, so they don’t instantly melt the base of the swirl. Pipe slightly smaller portions so that each serving is eaten quickly, and keep your filled piping bag resting in the coldest part of the freezer between cones. Over time, you’ll find that small adjustments in sugar composition, stabiliser level and serving temperature give you a huge amount of control over your homemade Mr Whippy-style ice cream. With each batch, you move closer to that elusive goal: a nostalgic, van-worthy swirl you can produce on demand in your own kitchen.