Plastic Padding Chemical Metal has established itself as an indispensable repair solution for professionals and DIY enthusiasts alike. This two-part polyester-based filler represents a remarkable advancement in repair technology, offering exceptional bonding capabilities across multiple substrate types. Whether you’re restoring a classic car, repairing industrial equipment, or tackling household maintenance tasks, understanding the chemical composition, proper application techniques, and critical safety considerations will ensure successful, long-lasting repairs. The product’s ability to bond in just 10 minutes, resist temperatures up to 160°C, and withstand exposure to water, fuel, and most chemicals makes it an invaluable addition to any workshop or toolbox.
Chemical composition and metallurgical properties of Two-Part polyester fillers
The remarkable performance characteristics of Plastic Padding Chemical Metal stem from its carefully formulated chemical composition. Understanding these components and their interactions provides insight into why this product delivers such exceptional results across diverse repair applications. The dark grey appearance isn’t merely aesthetic—it indicates the presence of specific metallic fillers that contribute to the product’s structural integrity and thermal properties.
Polyester resin matrix and styrene monomer crosslinking mechanisms
At the heart of Chemical Metal lies an unsaturated polyester resin matrix that forms the primary binding component. This resin system contains styrene monomers—volatile organic compounds that facilitate crosslinking during the curing process. When the hardener is introduced, these styrene molecules begin bridging between polyester chains, creating a three-dimensional network structure. This crosslinking mechanism transforms the initially paste-like material into a rock-hard solid with impressive mechanical properties. The styrene content, typically around 244g/l in the formulation, contributes to the characteristic odour during application and necessitates proper ventilation protocols during use.
Talc and aluminium powder fillers for enhanced adhesion
The inclusion of mineral fillers such as talc and aluminium powder significantly enhances the product’s performance characteristics. Talc particles provide dimensional stability and reduce shrinkage during curing—a critical factor when filling larger voids or gaps. The aluminium powder serves multiple functions: it increases thermal conductivity, allowing the repaired area to dissipate heat similarly to the surrounding metal substrate, and it contributes to the product’s machinability after curing. These metallic particles also improve adhesion to metal substrates by creating microscopic mechanical interlocking with the prepared surface. The ratio of these fillers to the resin matrix has been optimised to balance workability during application with final hardness and strength.
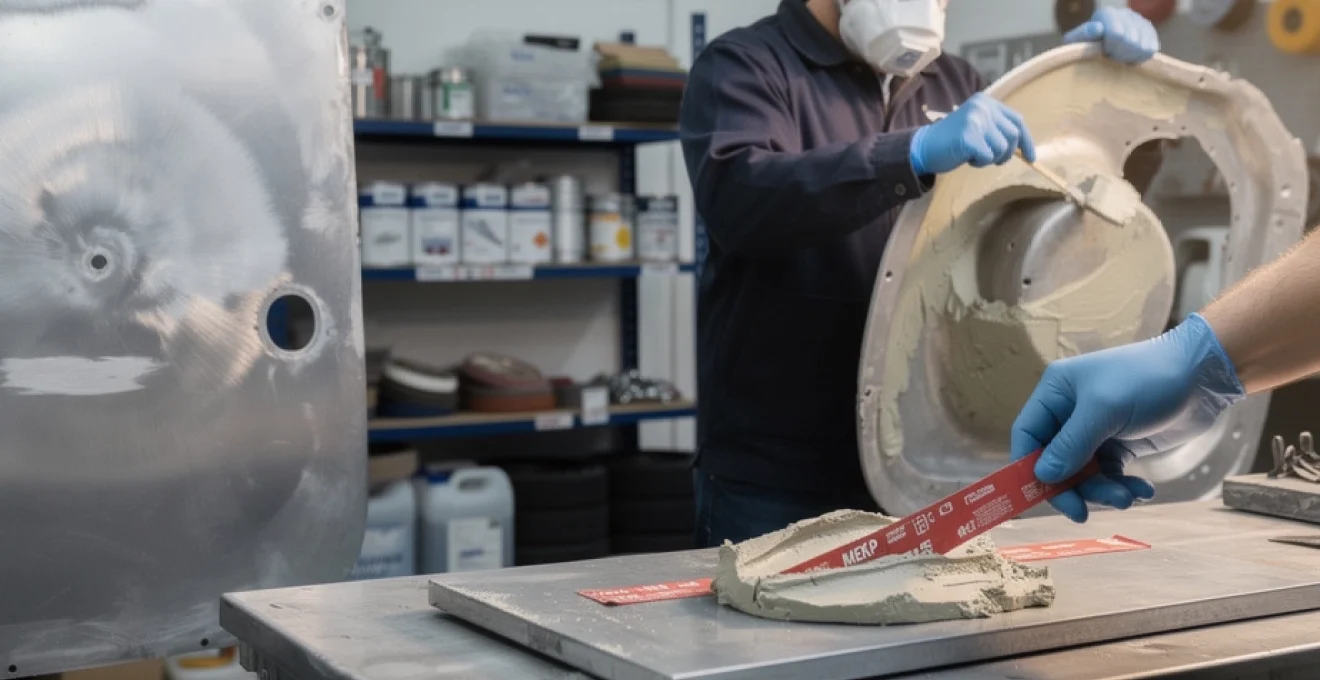
Curing agents: methyl ethyl ketone peroxide (MEKP) hardener systems
The hardener component typically contains methyl ethyl ketone peroxide (MEKP), an organic peroxide that initiates the polymerisation reaction. When you mix the resin paste with the hardener, MEKP generates free radicals that attack the carbon-carbon double bonds in the polyester chains and styrene monomers. This radical polymerisation proceeds rapidly once initiated, explaining the relatively short working time of 5-10 minutes. The MEKP concentration is carefully calibrated to achieve a balance between adequate working time and rapid cure. Incorrect mixing ratios can result in either incomplete curing or excessively rapid setting that doesn’t allow proper application. The peroxide hardener is also responsible for potential sensitisation hazards, making proper personal protective equipment essential during handling.
Temperature-dependent exothermic reaction kinetics during application
The curing process of Chemical Metal is distinctly exothermic, meaning it releases heat as the chemical reaction proceeds. This temperature rise isn’t merely a side effect—it’s integral to achieving full cure. Ambient temperature dramatically affects both the working time and cure rate. At 20°C, you can expect the standard 5-10 minute working time and 20-minute cure to machinability. However, at temperatures below 10°C, the reaction slows considerably, potentially doubling or tripling these timeframes. Conversely, temperatures above 25°C accelerate the reaction, sometimes reducing working time to just 3-4 minutes. This temperature sensitivity means you
must adapt your mixing and application strategy. In warmer conditions, you should mix smaller batches of plastic padding for metal and spread the material quickly in a thinner layer to avoid excessive heat build-up and potential cracking. In colder environments, pre-warming the metal substrate slightly (without overheating it) and storing the filler at room temperature can help maintain predictable cure times. For very deep sections, the exothermic reaction can become intense, so it is safer to build up the repair in multiple layers rather than attempting a single, thick pour.
Surface preparation protocols for ferrous and non-ferrous metal substrates
The long-term success of any plastic padding metal repair depends heavily on surface preparation. Even the best two-part polyester filler cannot compensate for an oily, smooth, or heavily corroded substrate. By following structured surface preparation protocols for ferrous metals such as mild steel and cast iron, as well as non-ferrous metals like aluminium, copper, and galvanised steel, you dramatically improve adhesion and reduce the risk of delamination. Think of this stage as creating a controlled, clean, and textured surface that allows the filler to form both chemical and mechanical bonds with the base material.
Mechanical abrasion techniques: 80-grit to 120-grit surface profiling
Mechanical abrasion is the foundation of effective bonding for plastic padding on metal. The goal is to create a uniform, matt surface profile using abrasives in the 80‑grit to 120‑grit range, which offers an ideal balance between roughness and surface area. Coarser abrasives than 80‑grit can leave deep scratches that telegraph through after sanding, while finer than 120‑grit may not provide sufficient mechanical key for the polyester filler. You can achieve this profile using flap discs, fibre discs, or sanding blocks, depending on the size and accessibility of the repair area.
For large automotive panels, a dual-action (DA) sander equipped with 80‑grit paper is often the fastest way to remove paint and corrosion while establishing consistent surface roughness. On smaller components or intricate castings, hand-sanding with 80‑120‑grit paper is adequate, provided you remove all gloss and contamination from the metal surface. Always extend the abraded area 20‑30mm beyond the visible damage; this extra margin ensures the filler transitions smoothly into sound material. After abrading, use a clean brush or low-pressure compressed air to remove dust before moving on to degreasing.
Degreasing and solvent cleaning with acetone or panel wipe solutions
Once the correct surface profile is established, all traces of oil, silicone, and other contaminants must be removed. Residual grease is one of the leading causes of adhesion failure when using plastic padding for metal repair. Professional practice is to use a dedicated panel wipe or an appropriate solvent such as acetone, applied with a clean, lint-free cloth. Always avoid recycled rags that may contain hidden hydrocarbons or silicone polishing residues, as these can transfer back to the surface you are trying to clean.
An effective approach is the “two-cloth” method. First, soak one cloth lightly with solvent and wipe the area to lift oils and residues. Immediately follow with a second, dry cloth to collect the dissolved contamination before the solvent flashes off. Repeat this process until the cloths show no signs of residue. Allow the surface to dry completely; plastic padding should never be applied over a damp or sweaty metal substrate. If you are repairing components exposed to cutting fluids or brake fluid, consider an initial wash with a suitable detergent and hot water, followed by solvent cleaning, to ensure deep contamination is removed.
Oxide layer removal on aluminium and galvanised steel surfaces
Non-ferrous metals such as aluminium and galvanised steel present additional challenges due to their tenacious oxide layers. While these oxide films provide corrosion resistance, they are relatively weak in terms of cohesive strength and can compromise the bond with polyester fillers. To ensure durable plastic padding metal adhesion, you must abrade through the oxide layer to expose fresh, bright metal, then apply the filler within a short time window before significant re-oxidation occurs. On aluminium body panels or castings, use 80‑120‑grit abrasive discs or non-woven conditioning pads to remove the dull, chalky oxide film.
Galvanised steel requires similar treatment, but care must be taken not to overheat the surface, which could damage the zinc coating. Light grinding or sanding until the surface appears uniformly bright is usually sufficient. After abrading, repeat the solvent cleaning step, as fine zinc or aluminium particles can trap residual oils. Wherever possible, apply the mixed filler within 30–60 minutes of oxide removal, especially in humid environments. This practice minimises the thickness of any new oxide layer and maintains a strong mechanical key for the plastic padding.
Phosphate conversion coatings for maximum mechanical bonding
For demanding environments—such as marine repairs, underbody chassis work, or industrial machinery—an additional surface conditioning step can further enhance adhesion and corrosion resistance. Phosphate conversion coatings (for example, zinc or iron phosphate) react chemically with the metal surface to create a microcrystalline layer that improves paint and filler bonding. When used under plastic padding for metal repairs, these coatings provide a stable, micro‑rough anchor pattern and inhibit under-film corrosion. They are especially useful on steel panels that will be exposed to moisture, road salt, or chemical splash.
In practice, you might use a phosphating wash primer or a dedicated metal conditioner according to the manufacturer’s instructions, followed by a thorough rinse and drying phase. It is important to ensure the conversion coating is fully cured and free from powdery residues before applying polyester filler. While not strictly required for every small repair, phosphate treatment can make a noticeable difference in long‑term durability where environmental conditions are harsh. As with all pre-treatment chemistry, always check that the specific product is compatible with two-part polyester fillers and does not contain high levels of residual solvents that could interfere with curing.
Automotive panel repair and collision damage restoration applications
Plastic padding for metal has become a mainstay in collision repair shops and restoration workshops because it bridges the gap between welding, panel beating, and final finishing. Modern body fillers like Chemical Metal are engineered to bond securely to steel, aluminium, and even fibreglass, allowing technicians to restore original contours without excessive heat input. With appropriate use, a high-quality two-part polyester filler can provide many years of service, even under paint, clearcoat, and in areas exposed to vibration and stone impact. How does this translate into real-world automotive applications you might encounter?
Dent filling and surface levelling on vehicle body panels
Dent repair is perhaps the most common use of plastic padding on metal. After pulling or hammering out the majority of the damage, a thin layer of filler is applied to restore the exact panel contour. Here, the principle is to use the filler as a finishing material rather than a structural substitute; large, deep dents should be mechanically reduced first. For shallow depressions, a skim coat of Chemical Metal, spread with a flexible spreader, can level the surface efficiently. Working within the 5–10 minute pot life, you can feather the filler beyond the damaged area to ensure a seamless transition after sanding.
Once cured (typically around 20 minutes at 20°C), the filled area can be sanded with 80‑120‑grit to knock down high spots, followed by 180‑240‑grit to refine the surface before primer. Using a long sanding block or a guide coat will help you detect low areas and prevent “wavy” panels. Have you ever noticed repairs that are visible only when sunlight rakes across the panel? Those are usually the result of inadequate surface levelling and sanding technique rather than the filler itself. Taking the time to build, block, and refine each layer of plastic padding is what separates professional repairs from quick fixes.
Rust pit remediation and corrosion cavity repair techniques
Corrosion repair requires a more critical approach because polyester fillers must never be used to hide or encapsulate active rust. All loose scale, perforated metal, and deep corrosion pits should be mechanically removed, often by grinding back to sound metal or cutting out and welding in new sections. Once you have a solid base, plastic padding for metal can be used to reconstruct minor pitting, surface irregularities, or weld depressions. Think of the filler as a cosmetic and sealing layer on top of structurally sound metal, not a replacement for missing steel.
For deep pits and cavities that remain after rust removal, you may need to apply the filler in multiple lifts, allowing each layer to cure before adding the next. This layered approach reduces internal stress and minimises the chance of pinholes forming at the surface. Before priming and painting, always inspect the repair area under strong light and use a contrasting guide coat to reveal any remaining imperfections. In regions where road salt and moisture are common—such as wheel arches and lower door skins—backing up plastic padding repairs with appropriate primers, seam sealers, and cavity waxes is essential for long-term corrosion resistance.
Seam sealing and weld joint finishing on chassis components
Another valuable use for Chemical Metal is finishing welds and seams on structural or semi-structural components, such as chassis rails, suspension mounts, or repaired subframes. After welding and grinding, it is common to be left with minor porosity, grinding marks, and irregular transitions that are difficult to seal with paint alone. A thin layer of plastic padding for metal can smooth these areas, providing both a more uniform appearance and an additional moisture barrier. Because the cured filler is resistant to water, salt water, oil, and fuel, it is well suited to underbody and engine bay environments when overcoated correctly.
To maximise durability, apply the filler only to fully cooled welds that have been cleaned of slag, spatter, and grinding dust. After shaping and sanding, follow up with an epoxy or etch primer, seam sealer where necessary, and a durable topcoat. For areas exposed to direct stone impact, such as wheel wells, an underbody coating or stone chip guard can be added over the painted repair. While polyester filler itself is not a structural reinforcement, its ability to close pinholes and micro-voids in weld zones significantly reduces the risk of corrosion starting at those weak points. In this sense, plastic padding acts as both a cosmetic finisher and a practical corrosion prevention tool.
Industrial metal fabrication and manufacturing repair scenarios
Beyond automotive work, plastic padding for metal plays an important role in industrial maintenance and fabrication environments. Manufacturing plants, marine workshops, and agricultural operations frequently use two-part polyester fillers to restore worn housings, rebuild flanges, and seal minor leaks in non-pressurised systems. Because products like Teroson UP 130 (formerly Plastic Padding Chemical Metal) withstand temperatures up to about 160°C and resist oil, fuel, and many weak chemicals, they are ideal for machine bases, gearbox casings, pump housings, and even fuel tank repairs when used as specified.
For example, a damaged threaded boss on a cast housing can sometimes be rebuilt by first cleaning and abrading the area, then applying Chemical Metal and re‑tapping the thread once cured. Similarly, chipped concrete machine plinths or cracked mounting pads can be levelled and resurfaced with plastic padding, providing a stable base for reinstallation. In marine and offshore contexts, the product’s ability to bond even to slightly damp surfaces—and in some formulations, to cure under water—offers clear advantages for emergency patching of hull fittings, deck hardware, or non‑critical pipework. While such repairs may not replace full weld or component replacement in high‑pressure or safety‑critical systems, they provide a fast, economical way to restore functionality and extend the service life of expensive equipment.
Application methodology: mixing ratios and working time parameters
Correct application technique is where theory meets practice. Even with perfect surface preparation, incorrect mixing ratios, rushed application, or ignoring ambient temperature can lead to weak bonds, surface tackiness, or excessive porosity. By understanding how catalyst levels, pot life, and layer thickness interact, you can treat plastic padding for metal with the same care you would give to welding procedures or paint systems. The goal is a controlled, predictable cure that results in a rock‑hard, fully bonded repair every time.
Correct catalyst-to-resin proportions for optimal cure rates
Two-part polyester fillers typically require a hardener addition of around 2–3% by weight, though the exact ratio can vary between brands. For Chemical Metal, this usually translates to a small pea-sized amount of MEKP hardener for each golf ball-sized portion of base paste, as indicated on the packaging. Under‑catalysing (too little hardener) can result in a soft, gummy repair that never fully cures, especially in cooler conditions or thicker sections. Over‑catalysing (too much hardener) may shorten the working time drastically, increase exotherm, and in extreme cases lead to cracking or internal brittleness.
A simple way to improve consistency is to weigh the components on a small digital scale when performing critical repairs or when you are new to the product. Mix the base and hardener thoroughly on a clean, flat mixing board using a wide spatula, folding and smearing the material until the colour is uniform with no streaks. Inadequate mixing can leave unmixed pockets of paste or hardener, leading to soft spots or localised over‑cure. Treat this stage like mixing epoxy resin: a minute or two of dedicated, thorough blending pays dividends in mechanical strength and reliability.
Ambient temperature effects on pot life and open time
Ambient temperature has a profound impact on pot life—the workable time after mixing during which the filler remains spreadable. At a typical workshop temperature of 20°C, many plastic padding for metal products offer 5–10 minutes of open time before they begin to gel. However, at 30°C or in direct sunlight on a dark panel, this window can shrink to 3–4 minutes or less. Conversely, at 10°C, you might find that the material remains soft and sandable for significantly longer, with full cure delayed beyond the usual 20 minutes.
How can you manage these temperature-driven changes in real-world conditions? In hot environments, mix smaller quantities, use a metal mixing board to help dissipate heat, and apply the filler immediately in a thin, wide layer instead of leaving it as a thick mound on the board. In cold conditions, avoid working directly on icy or very cold metal; if safe to do so, warm the substrate slightly and store both the filler and hardener indoors at room temperature. Never attempt to compensate for low temperatures by adding extra hardener beyond the recommended ratio—doing so may seem to help cure time but can compromise long-term mechanical performance.
Layering techniques for deep cavity fills beyond 6mm thickness
Deep repairs pose a particular challenge because thick sections of polyester filler generate more heat and can shrink as they cure. As a rule of thumb, any cavity deeper than 4–6mm should be filled in multiple layers rather than a single pour. The first layer acts as a bonding and bedding layer, pressed firmly into the keyed metal to eliminate air pockets. After this base layer has cured to a firm, non‑tacky state, subsequent layers can be applied, each no more than 6–8mm thick, until the repair is slightly proud of the surrounding surface.
This stepwise build-up reduces internal stresses, helps prevent cracking, and allows each layer to dissipate heat safely. Between layers, a light abrasion with 80‑120‑grit ensures an optimal mechanical key, especially if more than a couple of hours have passed since the previous application. In situations where very deep voids or missing sections are present, some technicians insert a suitable backing material—such as fibreglass mat or metal mesh—before applying plastic padding for metal, effectively giving the filler a “skeleton” to bond to. This strategy is comparable to using rebar in concrete: it provides additional reinforcement where the filler alone would otherwise be too thick.
Wet-on-wet application versus sequential curing strategies
When building up large or complex repairs, you can choose between wet‑on‑wet application and fully cured, sequential layers. Wet‑on‑wet means applying a new layer of filler while the previous one is still in its green stage—firm enough to hold shape but not fully cured. This approach can improve interlayer bonding and speed up the repair, as the chemical crosslinking continues through both layers. However, it requires careful timing and an experienced eye; apply the next layer too soon and the material may slump, too late and you lose the benefits of chemical bonding.
Sequential curing, where each layer is allowed to harden completely before abrading and applying the next, is slower but more forgiving. It is often the safer choice for beginners or for critical repairs where dimensional accuracy is important. Which approach is best for your plastic padding metal repair? If you are dealing with deep cavities in vertical panels or overhead surfaces, sequential curing generally offers better control. For horizontal surfaces with moderate depth, wet‑on‑wet can be efficient, provided you monitor the cure stage closely and keep layer thickness modest.
Health and safety compliance: volatile organic compound exposure controls
While two-part polyester fillers are incredibly useful, they also present specific health and safety challenges. The styrene monomer used as a reactive diluent is a volatile organic compound (VOC) with a distinct odour, and MEKP hardeners are powerful oxidising agents. Responsible use of plastic padding for metal therefore involves more than just good technique; it requires a structured approach to exposure control, personal protective equipment (PPE), and regulatory compliance. By treating these materials with the same respect as welding fumes or solvent-based paints, you can protect both yourself and your work environment.
Respiratory protection: FFP2 and organic vapour respirator requirements
Styrene vapour concentrations can quickly rise in enclosed spaces, particularly when large areas of filler are being applied or sanded. Even at levels below the national occupational exposure limits, some individuals may experience headaches, dizziness, or respiratory irritation. When working indoors without robust mechanical ventilation, a properly fitted respirator equipped with organic vapour cartridges (often rated A1 or A2) is strongly recommended. For dry sanding cured filler, an FFP2 or FFP3 particulate respirator helps prevent inhalation of fine dust, which can irritate the respiratory tract and eyes.
For short, low‑volume tasks in well‑ventilated areas, local regulations may allow work without tight‑fitting respirators, but good practice is to err on the side of caution—especially if you perform this work regularly. Combination filters that protect against both particulates and organic vapours provide a convenient, all‑round solution for bodyshop environments. As always, facial hair and incorrect strap tension can compromise the seal of tight‑fitting masks, so fit‑testing and periodic training are crucial. Think of your respirator as essential workshop equipment, in the same category as your welding helmet or safety glasses.
Dermal contact prevention with nitrile chemical-resistant gloves
Skin contact with uncured polyester resin or MEKP hardener should be minimised, as repeated exposure can lead to dermatitis or sensitisation. Disposable nitrile gloves offer an excellent balance between chemical resistance, dexterity, and cost, and they are widely used in professional refinishing shops. Vinyl gloves generally provide poorer resistance to solvents, while some latex gloves can degrade when exposed to styrene-rich products. Ensure that the gloves you choose are rated for organic solvents and oxidising agents as indicated by the manufacturer’s chemical resistance chart.
In addition to gloves, consider wearing long sleeves or disposable coveralls when working with large quantities of plastic padding for metal, particularly during overhead or vertical applications where drips are likely. If skin contact does occur, remove any contaminated clothing and wash the affected area promptly with soap and water—avoid using solvent thinners on your skin, as these can increase absorption of chemicals. Maintaining good housekeeping, such as wiping spills immediately and disposing of used mixing boards and spreaders responsibly, further reduces the chances of accidental contact.
Adequate ventilation standards and LEV system integration
Ventilation is one of the most effective controls for VOC exposure when using plastic padding for metal. For small-scale DIY work, opening windows and using portable fans to promote cross‑flow ventilation may be sufficient, provided you avoid blowing dust directly onto wet filler. In commercial workshops, however, local exhaust ventilation (LEV) systems—such as downdraft tables, extraction walls, or flexible fume arms—offer far more consistent protection. These systems capture vapours and sanding dust at source, preventing them from spreading throughout the workspace.
When integrating plastic padding operations into an existing LEV system, position your mixing and application station so that airflow draws vapours away from your breathing zone. Regular maintenance of filters, ducting, and fans is essential to keep extraction performance within design specifications. Many national safety agencies provide guidance on minimum air changes per hour for bodyshops and fabrication areas; aligning your ventilation strategy with these benchmarks not only protects worker health but can also support compliance with VOC emissions regulations. In effect, a well‑designed LEV system is the invisible partner that makes frequent use of two-part fillers both safer and more comfortable.
COSHH risk assessment for styrene and peroxide sensitisation hazards
In the UK and many other jurisdictions, substances like styrene and MEKP fall under specific control regimes such as COSHH (Control of Substances Hazardous to Health). A thorough COSHH assessment for plastic padding for metal should start with the product’s Safety Data Sheet (SDS), which outlines hazard classifications, exposure limits, and recommended controls. From there, you evaluate how, where, and how often the filler is used: mixing, application, sanding, and disposal all present distinct risk profiles. The assessment should also consider sensitive individuals, such as workers with pre‑existing respiratory conditions or skin allergies.
Key elements of a robust COSHH plan include clearly defined PPE requirements, ventilation and LEV specifications, storage and segregation rules for MEKP hardeners, and emergency procedures for spills or accidental contact. Peroxides must be stored away from combustible materials and sources of heat, ideally in dedicated cabinets, and containers should remain tightly closed when not in use. Training staff to recognise early signs of sensitisation—such as persistent skin irritation or respiratory symptoms when exposed to styrene—allows you to intervene before more serious health problems develop. By embedding these controls into your daily routine, you turn what could be a complex regulatory burden into a straightforward, standardised way of working safely with advanced metal repair fillers.